A comprehensive climbing checklist for any setting. This list is great for an indoor climbing session as well as multi-pitch climbing outdoors. For multi-day trips, you can add gear from the backpacking checklist.
I designed this climbing checklist for everyone who prefers to have an easy-to-access document at all times. You can download this checklist as a PDF/PNG/JPG. You can even print it out for the satisfaction of checking off the boxes as you pack!

| Basics | Bouldering | Top Roping | Sport Climbing | Trad Climbing | Extras | Health / Safety | Personal Items | Food |
| Climbing Shoes | Crash Pad(s) | Climbing Harness | Rope Tarp | Cams | Follower Pack / Daypack | Sun Protection | Phone | Water Bottles |
| Chalk Bag | Locking Carabiner | Quickdraws (12-18) | Hexes | Approach Shoes | Guidebook | Identification | Meals / Snacks | |
| Chalk | Belay Device | Runner | Nuts / Nut Tool | Personal Anchor System | First Aid Kit | Headphones | ||
| Climbing Rope / Rope Bag | Alpine Draws | Gear Sling | Extra Clothing | Chargers | ||||
| Static Rope / Webbing | Climbing Tape | Portable Battery Pack | ||||||
| Helmet | Brush | |||||||
| Stick Clip | ||||||||
| Belay Glasses | ||||||||
| Belay Gloves | ||||||||
| Extra Carabiners | ||||||||
| Autoblock | ||||||||
| Crack Gloves | ||||||||
| Headlamp / Flashlight |
Climbing Basics
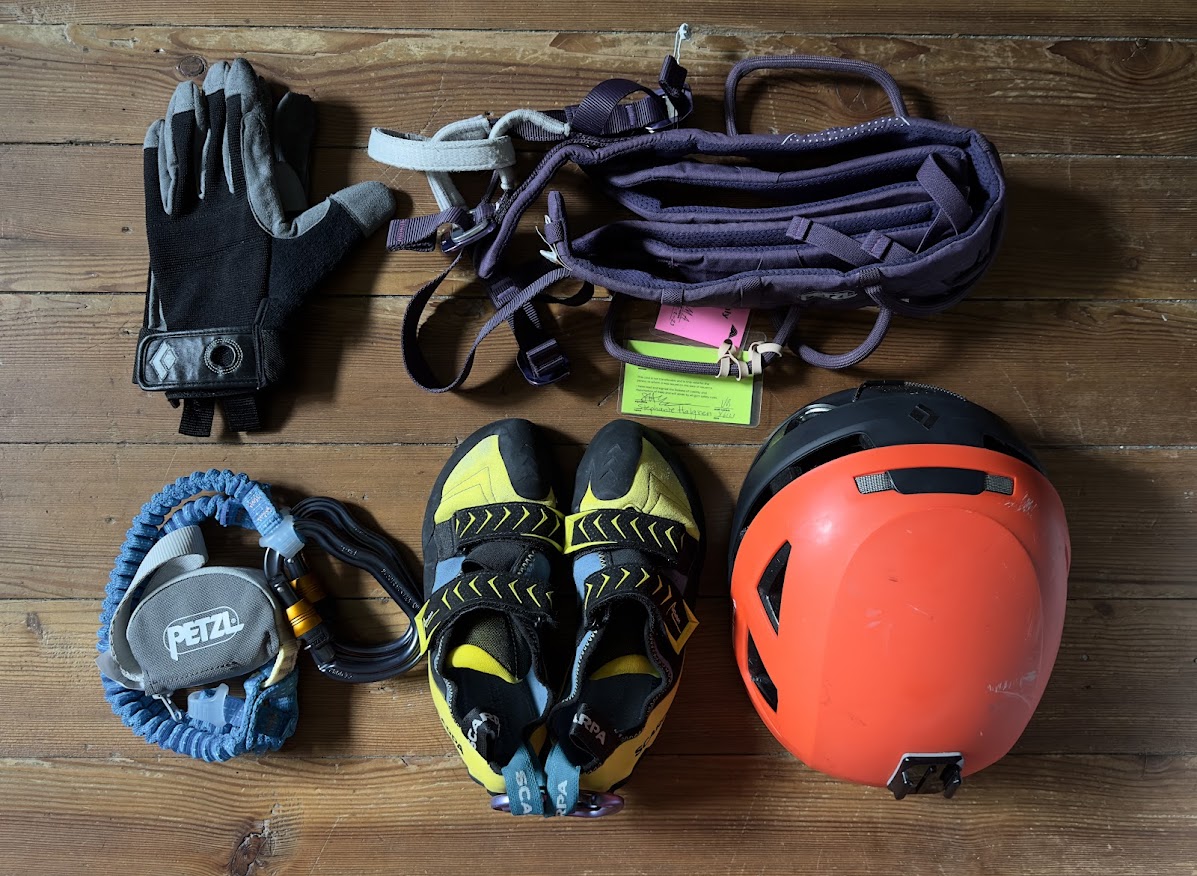
Climbing Shoes – Specialized for rock climbing. Most climbing shoes will fit like a glove, with little to no padding and sticky rubber soles to improve your grip on the wall. Scarpa, La Sportiva, Evolv, Five Ten, and Black Diamond are all extremely popular climbing shoe brands across the world. When picking out a climbing shoe, you can decide which kind of closure system you would prefer. The three options are lace-up, velcro, or slip-on shoes. More importantly, you will want to do some research on the “intensity” of the shoe you want to purchase. From neutral to aggressive, climbing shoes vary widely in how curved they are. This can have an impact on the precision of your climbing and how comfortable the shoes are to wear.
Chalk Bag – There are a few different shapes and sizes to choose from when it comes to chalk bags. Your choice of chalk bag depends on your activity of the day. Will you be bouldering or rope climbing? Most boulderers prefer to use a bucket-style chalk bag. They are big enough to fit both of your hands in at once and can hold a ton of chalk. Bouldering can be very social as well, so it’s nice to have a bag that everyone can share. Chalk bags for rope climbing are usually smaller since you need to be able to carry them with you on the wall as you climb. You definitely don’t want a bag that will get in your way!
Chalk – There are four different types of chalk to choose from for your climbing checklist. Chalk blocks come in a huge hunk of magnesium carbonate (the same compound used for all chalk types, with drying agents added in on occasion). They tend to be cheaper than other options. You can also keep the chalk in its block form or crush it into your desired texture. Loose chalk is already ground for you. Many brands offer different chalk consistencies – depending on your preference.
Eco chalk is a more eco-friendly option. Some climbing locations have banned normal climbing chalk due to its effect on the outdoor area. “White chalk graffiti” is frowned upon in some places, so chalk has been designed to get rid of that white residue. Liquid chalk is a chalk/alcohol blend that quickly dries into your hands. Because it dries so quickly and smoothly onto your skin, it stays longer on your hands and doesn’t leave huge chalk marks on the wall like normal chalk will do.

Bouldering
Crash Pad(s) – Also known as bouldering pads, are necessary for your outdoor bouldering climbing checklist. Before the 1980s, boulderers either climbed without padding below (which is super dangerous) or they would create makeshift pads with couch cushions or anything they could think of. Now, we have many great options that make bouldering more safe and enjoyable. There are two types of foam used to make crash pads: open cell and closed cell foam. Open cell foam is cushier to land on, but deteriorates more quickly than closed cell pads. Alternatively, closed cell pads are a bit stiffer to land on, but they last a much longer time.

Top Roping
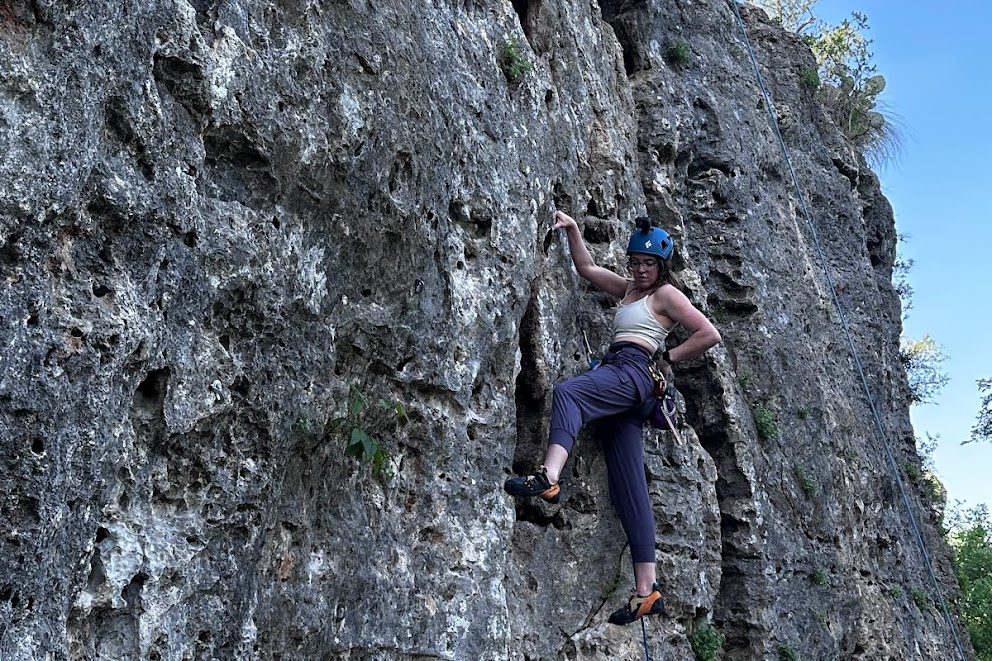
Climbing Harness – Climbing harnesses are a basic necessity for any type of rope climbing. While it’s tempting to purchase a cheaper (and potentially less comfortable) harness, consider this a long-term investment. Your harness will be your best friend on the wall, and you will definitely be thankful when the padding makes hanging from a rope bearable, or even pleasant. There are different types of harnesses for different activities. Sport climbing/gym harnesses work for standard rock climbing and sport climbing (a.k.a. lead climbing). Trad harnesses are designed for trad climbing and ice climbing harnesses are very similar, but designed for the cold. Alpine and mountaineering harnesses are versatile and lightweight. Lastly, you can find more specialized harnesses designed for canyoneering, competitive climbing, and anything else that fits into the climbing realm.
Locking Carabiner – Let’s get this straight – you cannot use just any type of carabiner for rock climbing. However, there are many non-locking carabiners that have a place in your pack. Quickdraws, for example, use normal (non-locking) carabiners. You will always want to use locking carabiners for belying, abseiling, and other similar tasks.
Locking carabiners offer maximum safety and are easy to use. You can choose from two kinds of locking carabiners: manual locking and auto-locking. You need to actively close manual locking carabiners, while auto-locking carabiners lock on their own. Auto-locking carabiners are great because they remove the chance of human error (forgetting to lock the gate). However, manual locking carabiners can be used as both a normal carabiner (when unlocked) and a locking carabiner, They’re a bit more versatile, but you will need to stay vigilant and lock them when necessary.
Belay Device – There are three kinds of belay devices to choose from for your climbing checklist. There are tubular belay devices, such as the ATC. They work for any kind of climbing and require an attentive belayer to use. To be fair – belaying always requires an attentive belayer – no matter the belay device used. Climbers have designed assisted-braking devices, like the GRIGRI, to automatically lock when sudden force is applied to the rope. Unlike tubular devices, the device itself provides additional safety mechanisms that help the belayer stop the climber’s fall. However, they don’t work for all kinds of rope and can make lowering more difficult than when using an ATC. Lastly, there’s the figure 8 belay device. People often use this device for rappelling, and require more attention than either of the other two devices to use.
Climbing Rope / Rope Bag – If you’re only climbing indoors, most climbing gyms will provide rope. If you are starting to go outdoors, then you’ll need to pick the right rope for your chosen activity. You will need to consider rope type, diameter, length, safety ratings, and other rope features (like being dry-treated or middle-marked). Make sure to talk to a professional and do a ton of online research before you buy a rope.
There are many things to consider when picking your rope that you probably would never think of on your own. It’s likely that any climbing gym employee can help you pick out the best rope for you. Many gyms also sell climbing ropes, so you have the option to feel out the ropes and buy it there. Climbers designed rope bags to help you carry the rope wherever it needs to go. You can also strap your rope on top of a backpack, so consider your options before you make the additional purchase.
Static Rope / Webbing – Static ropes and webbing are both helpful tools to pack for any climbing trip. Climbers use static ropes when they don’t want the rope to stretch as much as climbing/dynamic ropes do. Adventurers typically use them for abseiling, rappelling, rescue operations, and caving. They will often take webbing on climbing trips because it is multi-functional. Climbers use webbing to make slings, anchor extensions, or footholds/other supports in aid climbing. Static ropes are also used to tie anchors, but they weigh more than webbing does. Many climbers try to keep as lightweight as possible while climbing and therefore choose webbing rather than static rope (when tying an anchor).
Helmet – If you are climbing outside, you need a climbing helmet. Your indoor climbing gym may also set rules about wearing helmets indoors. There’s really no debate against wearing a helmet outdoors. If there’s a chance something might fall on your head – wear a helmet. There are lightweight options, sport-specific options, and customizable options. It may take a bit of experimenting, but you can find a helmet that meets all of your performance expectations. Keep in mind the wear and tear done to your helmet as you adventure outdoors, and replace when needed.

Sport Climbing
Rope Tarp – Rope tarps are used to keep your rope free of tangles and clean – even when climbing outside. Many rope bags double as rope tarps, so keep that in mind when purchasing a rope bag or rope tarp. If you do decide to just strap your rope to your pack and not buy a rope bag, you can buy a general-use tarp from any home goods store. As long as it’s easy to pack and keeps your rope off the ground, you’re good to go.
Quickdraws (12-18) – Quickdraws are essential for your sport climbing checklist. They attach your climbing rope to the wall as you climb higher and higher, minimizing the distance covered when you fall. Quickdraws are made up of two carabiners attached by a short piece of webbing. You will place one of the carabiners to a bolt on the wall, while the carabiner on the other side attaches to your rope. You will carry your quickdraws on your harness or gear sling and attach them as you go. Most sport climbers only need 12 quickdraws (or less for short routes), but longer routes usually require 16 to 18 quickdraws. There are crazy-long routes, however, that require 24 or more quickdraws.
Runners – Also known as climbing slings, runners can be used to create extended quickdraws or as part of your anchoring system. You can also use webbing to the same effect as a runner in many situations. Runners are helpful when you don’t have a quickdraw long enough to allow your rope to run straight. In general, it’s good to have a runner on hand while climbing.

Trad Climbing
Cams (and Wedges) – A trad climbing checklist requires a ton of protection gear. There are two types of “pro” gear – active and passive. Cams are the most popular type of active protection gear. They are meant to be put in parallel-sided cracks, where other tools (nuts) won’t work as well. Cams use weight and friction to stay in place. You can buy three-lobed or four-lobed cams. Four-lobed cams provide more contact with the rock but are heavier than three-lobed cams. Another important piece of active protection gear is the wedge. Wedges are lighter and smaller than cams and can fit into smaller cracks that no cam could fit into. Having a variety of cams and wedges is a good idea while climbing.
Nuts / Nut Tool – Nuts are a type of passive protection gear. Climbers consider them “passive” because they don’t have moving parts. While cams and wedges expand to fit into a crack and increase their pressure based on the weight applied, nuts are lodged into the rock and remain solely due to their placement in a crack. You will often need to use your nut tool to remove the nut as you take the route apart. Many climbers prefer to use nuts when they can, because they are much cheaper than alternative gear (like cams). It’s easier to deal with losing a 15-dollar nut than a 75-dollar cam.
Hexes – Hexes are a popular type of nut. Climbers can use them passively, but they can also put them into “active mode”. They have six sides and are less limited by how you can place them. If a climber places a hex at an angle, rather than straight-on, they increase the amount of potential pressure it will put on the rock. Other kinds of passive protection gear include tri-cams and tube chocks.
Alpine Draws – Alpine draws are a type of quickdraw designed for routes that aren’t entirely straight or don’t provide the best options for protection. When you climb in a zig-zag pattern, you might need alpine draws to increase the likelihood of all protection gear staying in place. They are easily adjustable, which means you can change their length when you want to keep your rope as straight and consistent as possible throughout the climb.

Additional Items
I listed everything else above on the climbing checklist. “Additional Items” includes extra climbing gear like belay glasses and gloves, personal items, healthy & safety items, and food. I get most of my climbing gear from REI (not sponsored), so check their gear out if you are in the United States!